Nord-France 1917
"But who shall dwell in these worlds if they be inhabited?…
Are we or they Lords of the World?…
And how are all things made for man"Johannes Kepler (quoted in The Anatomy of Melancholy)
Along a quiet sector of the Western Front, the German 2nd Army lay deep within the womb of their newly formed trench systems. Secure behind impregnable thick hedges of barbed wire,
they were confident in repulsing any attack. Their morale was further boosted by the costly attempts of the allies throughout the year, to breach the line successfully. The war of attrition seemed to be well in the favor of the defenders.
"Look, they clap eyes on us and we're dead, right? So, we gotta make a new life where they'll never find us. You know where? ...
Underground."
In spite of this , the B.E.F. were aiming to seize an important rail/communications centre from them. This town lay 46miles South of the Passchendaele mud and some 9 miles East of their own
front line. Originally designed as a raid to test the new artillery tactics of pre-zeroing and sound ranging, the plan gradually incorporated aircraft and armour. The latter not being used this
time in floundering penny packets but in large numbers and on firm chalk ground.
Despite the ongoing war with their critics (who were many, of all ranks and nations) it seemed, that the supporters of the Landship concept were to get a last chance ...
Coded Operation GY, the operation was to become the first all arms assault and the first great tank battle in history. As the world gave birth to another day, in the peacefull dawn light of the
20th November, a 6mile section of the German front trenches were struck by a wall of predicted artillery fire from 1000 guns. In it's wake roared forward over 400 'Fighting Machines' of the Tank
Corps.
Their mission, to breach and drive beyond the daunting and notorious Hindenburg Line.
The time was 06:20 hrs … the Battle of Cambrai had begun.
After reading The War of the Worlds by H.G. Wells and Bryan Coopers The Ironclads of Cambrai as a schoolboy, I couldn't help but notice the similarity of the two in many small details. I was so enthralled by both books, that my phantasy run riot and so I promised myself to make a diorama with each in mind. The years raced by and although I never got around to it, I never forgot my dream. So here we are … 40 years later. Better late than never !
BTW Quotes not attributed are taken from the music album The War of the Worlds by Jeff Wayne.
I wanted to make something special for Cambrai Day, without turning the project into a 1897 Steampunk affair. Believe me, I had a war of my own with this one.
Allow me to take you through 'the wire' ...
The Tank:
For this scene, I had to opt for a closed version - a rarity for me. The Mk.IV and the battle of Cambrai are unseparable. Mine is based on a real vehicle of the times. As a survivor of
Passchendaele and the current battle, she carries old and new scars.
G42 or Gladys belonged to G battalion of the 1st Tank Brigade and was the mount of 2nd Lt Lishman. Unfortunately, I only have two pictures of her in 1918, so the name and heart symbol on the glacis, as well as the serial number and it's colour, is a little artistic licence on my behalf.
If some of you are missing the red and white identification stripes on the front horns … you'll have to wait until the spring of '18 for these to appear.
There is still quite some debate as to wether the colour of the tanks at this time were in brown or grey. Thinking about the type of ground they operated upon, I decided to give my 'Female' a
chalk acrylic filter which, under changing daylight conditions, alterd the tone to … er … well … you pick a colour ;-)
The Fascine:
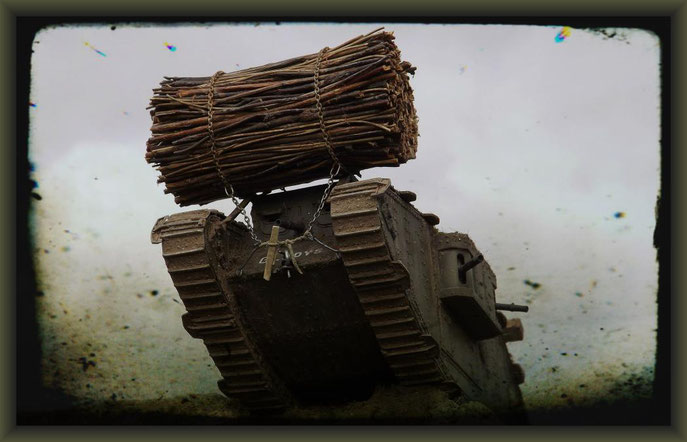
This is a bridging device as old as warfare itself and is made from small bundles of brushwood, called faggots. Sixty to seventy of these packets are then wrapped tightly together with chains and attached to the cab of the tank. In reality, the thing weighs over one and a half tons and is 10ft long with a diameter of about 4½ ft. The drawback being that, they were a one-shot comodity. Once placed, they were impossible to retrieve.
The operation went thus: As the tank approached the trench, the driver braked hard allowing the front horns to tip forward. At this moment the commander released a finger-like hook at the rear of
the cab and the fascine rolled off into the gap, allowing the tank to cross. They were mainly intended to give the rear horns some purchase driving out of the trench. Without the fascine the
vehicle would slide backwards and downwards into the trench ending up as a monument. Tank comanders and drivers were told to cross at cetain points of the line - the shallower and narrower the
better.
Although as stated, they consist of small bundels of brushwood, on close inspection they SEEM
to be made up of much larger saplings – some as thick as a mans arm.
So, I have included some lengths of wire into the mass, to at least suggest some smaller bundles.What was also important to me, was to make sure that the chains 'bit' into the mass to show tension. In order to achive this, I took the pre-selected 'saplings' out of their two week immersion (wood glue – water mix). Then built the fascine up while the twigs were still wet, measuring and trimming it into form. Using ring clamps as a template for the diameter, I twisted some copper wire around the surface to provide the 'bite' for the chains, which were attached after all was dry as cork and as hard as rock.
The 'club and hanf' on the glacis is a Spanish windlass, used to tighten the front chains to induce a spring action upon release. I've shifted the load and altered the chains slightly as the tank is lurching at an angle.
Tactics:
Although the Hindenburg Line sounds singular, it actually consisted of three successive trench lines with lighter defence in depth positions towards the rear. In order to cross all three, the
following tactic was employed ...
The advance tanks operated in groups of three and advanced in an arrowhead formation. The first tank drew up to the first line and, without releasing it's fascine, turned left firing in enfilade
along the enemy trenches. The second drew up to the same point and crossed over using it's fascine.
It then also turned left and took on the front and support trenches as well as crushing the second wire belt. The third tank crossed over the first fascine (depicted here) and crossed the second
line using it's fascine, turned left and machine gunned the support and third line trenches.
The first tank meanwhile, returned to cross over the both fascines to assault the third line trench with it's fascine. The second and third tanks would then cross behind the first tank and rally
in order to attack targets in the rear areas. Using their firepower to subdue the enemy and support each other all the way. They were followed by the infantry, who marked the crossing points for
the following tanks, provided trench clearing parties and blocked off the trenches in the immediate area.
The Trench:
I've made mine a little more ramshakle and shallower than the normal 20ft deep defences. This is quite plausible as not all streches of the line were built by the book as there were
understandably shortages of building materials. Here I've had to form the parapet and parados in such a way, as to obtain the sharp 'dramatic' angle of the tank as well as caving in one side
(artillery fire) to suggest a weak spot and make the trench scene a little less claustrophobic. Naturally, I've excluded the wire belt as it was not on the edge of the forward trenches but some
20yds out in front.
The Figures:
The I.C.M.'s were altered to blend in with the scene. I left off most of their equipment to give an impression of the half prepared state most troops found themselves in that morning.
As bad news travels fast, a heavy use of smoke shells all over the sector were indispersed with gas in a few selected areas. This caused men to don their gas masks unnecessary and further reduce their vision.
The medic is not to happy at being knocked into the drainage ditch by the first fascine, whose chain has broken, leaving him to dig himself out of the mess. In such a position, he can only hurl abuse at the second 'Devil's Coach'. Notice his early Rahmenmaske with updated cloth filter lying on the firestep. Nearby, a Bavarian Schütze is trying to disappear into the wall away from the prying eyes of the port Lewis gunners.
"They attacked us, they wiped us out.
Just hunks of metal but they knew exactly what they were doing."
In the other corner, a sapper has been nicked in the right arm and is franticly trying to don his Ledermaske with the other, as he 'legs-it' up the (zig-zag) communications trench. The half buried forward lookout has just raced back to the firing line along his tunnel, only to be 'pipped at the post' by the 'metal monsters'. Struggling up against a half jammed door, he may well soon wish he stayed where he was.
Although the Germans had already met or were aware of the British tanks (a couple of positions put up stiff resistance), the shock of seeing a fleet of Landships on their front doorstep having flattend their precious wire belts, must have struck fear into the strongest.
Small arms fire, hand grenades and even their anti tank rounds or K-bullets had no effect on the improved armour of the Mk.IV. The majority fled and over 2000 prisoners were taken. At 11:30 hrs almost all of the Hindenburg and it's support trenches in the sector were in allied hands. The initial advance of 4000yds was achived at very little cost to the B.E.F., the weight and shock of their attack causing panic amongst the defenders.
"This was no orderly march, it was a rout – a stampede."
As every cloud has a silver lining, the battle was to turn into a silver lining with a cloud. One by one the tanks were knocked out or broke down.
"… and there lay the Martians – slain, splashed to the four winds."
The pendulum of war was to swing back upon the allies. On the 30th, a massive and well organised German counter attack, using new stormtrooper tactics, retook the ground won on those first days. This enabled them to recover and repair the damaged tanks and use them in the coming year against their former owners. It was also the dawning of the German Panzer arm, which would bring even greater horror to the world 22 years later.
"Maybe we'll capture a Fighting Machine ourselves, eh! ... and then Wallop! Whoosh with our heat ray, Whoosh! ...
and then running and dying - beat them at their own game."
On the 1st of December, both camps were presented with a 'butchers bill' for the battle.
Casualties were: Allies: 44,207 (sum inc 9000 P.O.W.s) / German: 41,000 (sum inc 11,000 P.O.W.s) ... and everything was more or less back were it started. Even so the Hindenburg Line had become
'breachable', leaving it's defenders to ponder on other ways to win the war.
The tanks themselves had also caused heavy casualties amongst their critics. Despite a great loss of vehicles, the Tank Corps had finally won their war by proving what could be done under the
right conditions.
A hundred years ago today, the imagination of a young science fiction author echoed in the fields before Cambrai. His strange visions were to put an end to the stagnation of trench warfare.
"Fighting Machines" were now the future … The Tank was here to stay.
"There's so many different worlds
So many different suns
And we have just one world But we live in different ones."
Mark Knopfler - Brothers in Arms
Completed: 06:20 hrs. 20.11.'17
British Mk.IV "Female" Tank
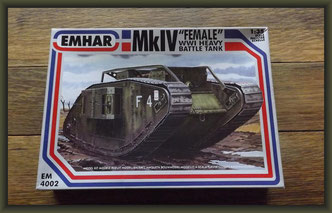
Emhar 1:35 No. 4002 / Building Report:
Stage 1:
This time I'm taking on the cheap and nasty Emhar female, who's boxart alone is a turnoff - painted in a light green hue with Hotchkiss MG's and a Mk V(?) configuration on thr rear roof – not exactly the best start.
The parts are very basic and have a rough fit that has to be constantly checked. For a 1917 version, this has to be fitted with Lewis MG's. My model has the less seen MG mounting – the ball mount minus the protection screen. As you can see, this conversion job was a bit of a headache as there are few surviving pictures of this detail to go by.
A few leftovers from my Takom MkI kits came in handy – cab front and roof, centre cuppola hatch, a few sides for the rear external fuel tank, undiching beam, schakels and a handfull of individual track links.
I know what your thinking … Why don't you use the Takom kit then?
Two reasons ... firstly: this is going to be 'heaving' with dirt and second: the Takom kit judging by their spare MkIV roof (from their MkI kit) is … deep breath … 6mm too long. The Emhar MkIV is
in the overall length bang on.
There is also the rather crass price difference, not that would have botherd me, but the expensive Takom also requires some extra work as some of the fittings are a little on the 'chunky' side.
For now though, I'll leave you with a quick glimpse of her main body ... ;-)
02.11.'17
Stage 2:
Today, I'll show some of the detail required to bring this model up to a respectable standard, that is without heavy scratchbuilding and aftermark kits.
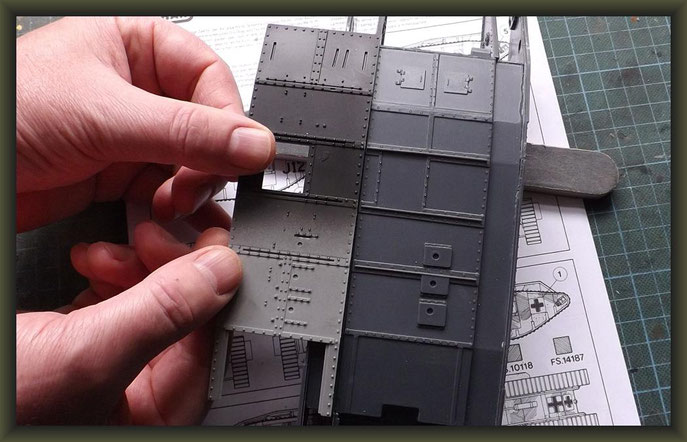
Front cab plate replaced by Takoms slightly better offering. Note plates behind the open visors.
New front tow hook and track tension bolts. Scratchbuilt supports for the unditching beam.
Some but not all rivets have been replaced.
Notice the amount of filling putty used and the loose fit of the M.G. sponsons … more work required here. Emhar's molded on rear tow shakles have been replaced with some bent wire.
I could have used the Takom flanges here but I need these for another ( cleaner ;-) ) project.
The rear shows the shortend exhaust pipe, rail brackets, a few rivets, built up fuel tank (Emhar ignores this completly) and the rear burster plates.
Up on the roof ...
Emhar has moulded on a small central joint too many. This has to be removed as does the small doors (a post-war fitting) inside the tool/spud box. The tool box itself has been hollowed out (the
same has to be done with Takoms) and fitted with some external attachments. What they are for I can only guess ... maybe tie-downs?
Another scatchbuilt-mystery is the somewhat overcomplicated mid rail supports … more on these next time.
I found the kits wedge-like cuppola a bit puny, so the top edge was cut flush to the sides and the Takom equivelent (with extended rim) was glued on top. More rivets plus a slight improvement to
the exhaust brackets.
Another important detail missing, is the diagonal strip above (and underneath) the female sponsons. Unlike the Mk. I/II sponsons, the Mk.IV's could be unbolted and pushed inward (in a sissors
action) to simplify transportation by rail.
04.11.'17
Stage 3:
So where were we?
Ach ja, the unditching rails. As you can see Emhar's representation leaves a lot to be desired.
The Takom kit comes with the rails and supports but these, apparently, need to be thinned down and updated. I had to scratch build the supports by rule of thumb as I had no measurements. It was
tough going even with good museum pictures, as each one consists of five small plates and ten rivets.
As for the rails, I armed myself with a couple of strips of Evergreen profile (2.4mm from heel to toe) and got stuck in. With the supports in position you just have to mark off, remove a segment
from the lower side and form the required angle. Here's a tip: if you're working with profiles like this, don't cut to the exact length straight off, you could well wind up too short of the mark.
Keep a decent overlap and then cut to size when it's finally fixed in position.
It might be better to shift the 'cheese dish' cuppola 1mm to the centre to give the starboard central support more room. I didn't bother here, so the alignment is slightly out on that side.
No big deal though, as these things were often, to utilize a boilermakers 'euphemism' ...
bent ter buggery.
The unditching beam from my Takom Mk.I Tank. Alas, this 'free part' also has to be … well,
I think y'know by now ;-)
08.11.'17
Stage 4:
Next up are the tracks.
Emhar's are very basic so you'll be better off buying an additional set if you're going to present it as a 'clean' model. Mine is a composite, made up of Emhar's and Takom's as the rear halves will be mud crusted. Starting with the leftovers from my Takom sets complete with 'spuds'.
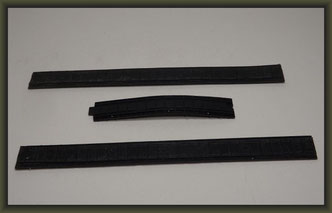
The problem that most modellers have with the Emhar tracks is, that the contact surface between track and body is minimal and causes the stiff track to spring off. Notice that I've thinned the inside face down to make them more flexible.
In the old days before individual links, stiff vinyl strip was all we had, so this was our solution ... cutting lightly along the joints, an imitation of track segments can be made. Ideal it is not, but they do become more flexible and are better than rounded links.
Another tip is, parts will always adhere better when their surfaces are slightly roughened.
On mine, I've also frazed out the inside edges of the wheel housing to allow myself more play during alignment.
The track has received some balsa strip fixed with contact gel, which allows you a few precious seconds more than the normal stuff.
This may all seem like excess work but not only do I want a solidly fixed track, I want to avoid this …
When built OOB, they sit on top of the outer rim, in reality there is a gap. A detail that I find must not be overlooked. BTW when it comes to excess work, check out Takom's mountain of roadwheels … they cannot be seen on the completed model !
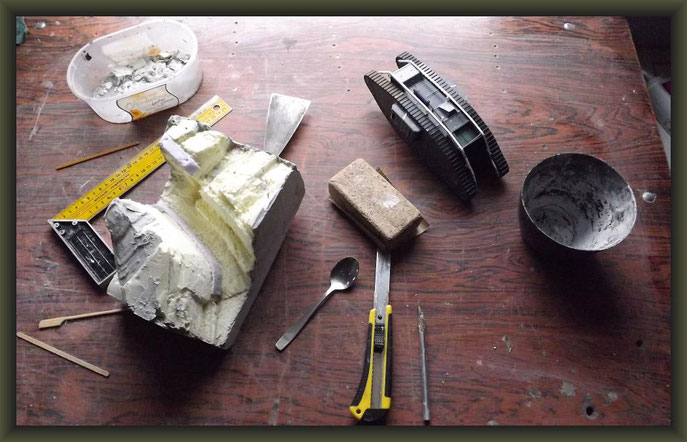
Another way is to fill the wheel housing before applying the track. I've done the underside this way to demonstrate.
One last tip: remember that an airbrush will not always get into small openings and blind spots. To make sure that no bare plastic or anything else shows through, I treat these areas with a layer of matt black.
So, this is the result of 40 mins trackwork. Emhar's catapillars superglued onto a wood
foundation, there's only one way these will spring off now and that's on the end of a chisel …
No, I'm not going to bloody demonstrate ;-)
12.11.'17
Stage 5:
Let's start this time with a minor correction ...
See the trapeze form on the back rail ? It's the arrestor plate for the undiching beam ...
I put it in the wrong position !
I was working from an original picture of this detail only to find out, that it was an exeption to the rule. It has to be moved higher up, otherwise the beam will connect with the tracks.
Annoying but no big deal ...
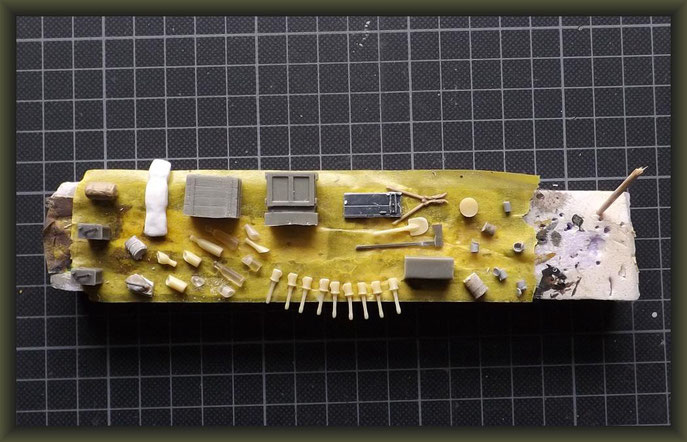
Here's some of the bits for the dio:
Regular visitors to the site will notice that I'm not a fan of advertising, but if I come across a product that, I think is 'worth it's salt', I'll mention it ...
The following set I can highly recommend:
Many moons ago, I bought the Franco-Prussian set from ICM and wasn't too keen on it.
So I decided, to get these for a kitbash. What a pleasant surprise I had on opening the box
Very true to scale, crisp accurate detail and with double the weapons/equipment.
Better than Dragon/Tamiya.
It was a shame to alter them for my Dio, but I think I'll buy them again for another project.
All in all … Well done ICM 👍
Right ... next stop: Cambrai Day, so I can't afford any more … er …
...'beating around the bush' ;-)
15.11.'17
 The
Gun Bucket


